

Hardening your WebApp using CDN/FW/WAF
Published: February 15, 2026
Author: Khalil Imitik
Overview
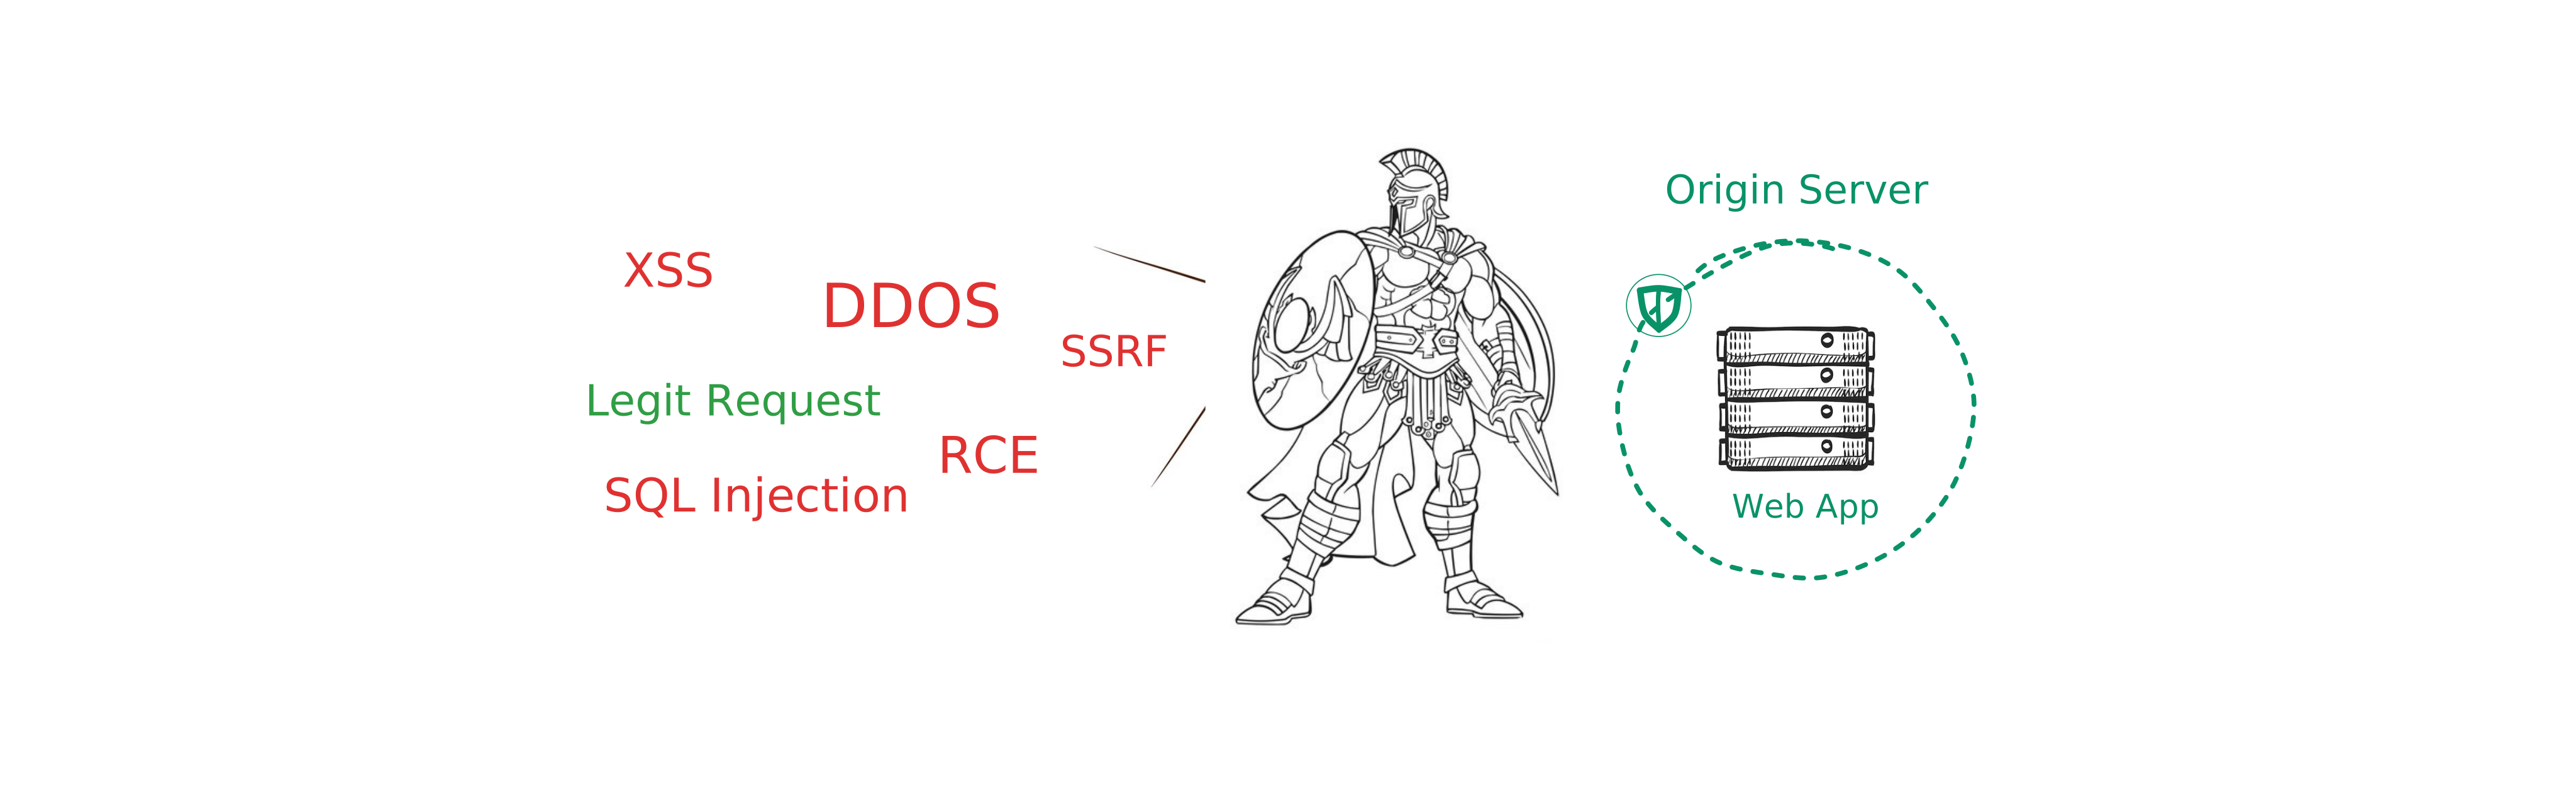
Section titled “Overview”Exposing your web application directly to the internet is asking for trouble. Cross-site scripting, path traversal, bots, denial of service, you name it. Before worrying about features or uptime, lock the front door first.
What’s The Plan
Section titled “What’s The Plan”We’re going to place three layers of defense in front of the server, each working together to block the most common attacks. Let’s get into it!
Content Delivery Network
Section titled “Content Delivery Network”A CDN is a reverse proxy that sits between your server and the internet. It doesn’t just absorb attacks like DDoS, it also caches your content globally (faster load times everywhere), terminates TLS on your behalf, and most importantly, hides your origin IP from the outside world
Without one, every request hits your server directly and your IP is fully exposed (which is not good)
There are plenty of CDN providers, CloudFront, Akamai, Fastly, Cloudflare. Pick whatever suits your stack. For me i’m going with Cloudflare here (for some reason)
Adding domain to the CDN
Section titled “Adding domain to the CDN”First, Sign up or log in to your CDN account and add your domain via Domains > Onboard a domain
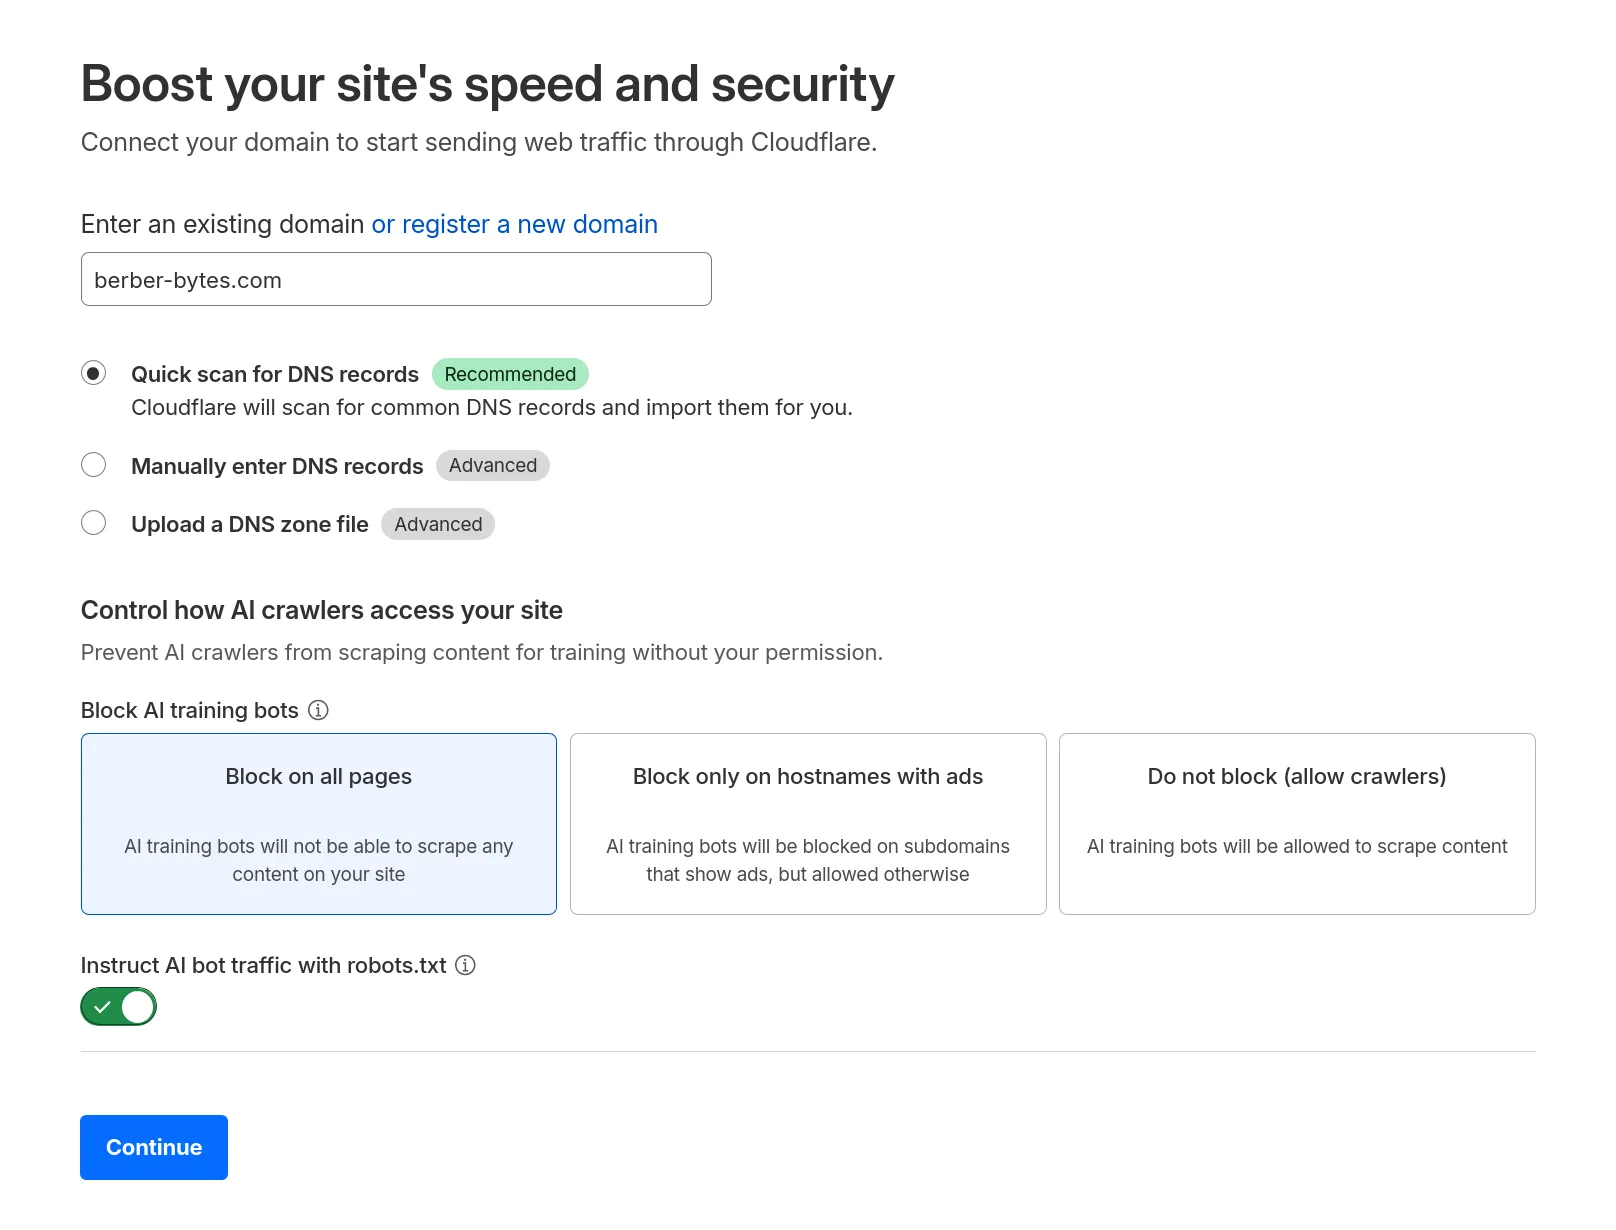
Then, head to your domain registrar and replace the existing nameservers with the ones Cloudflare gives you
Adding DNS records
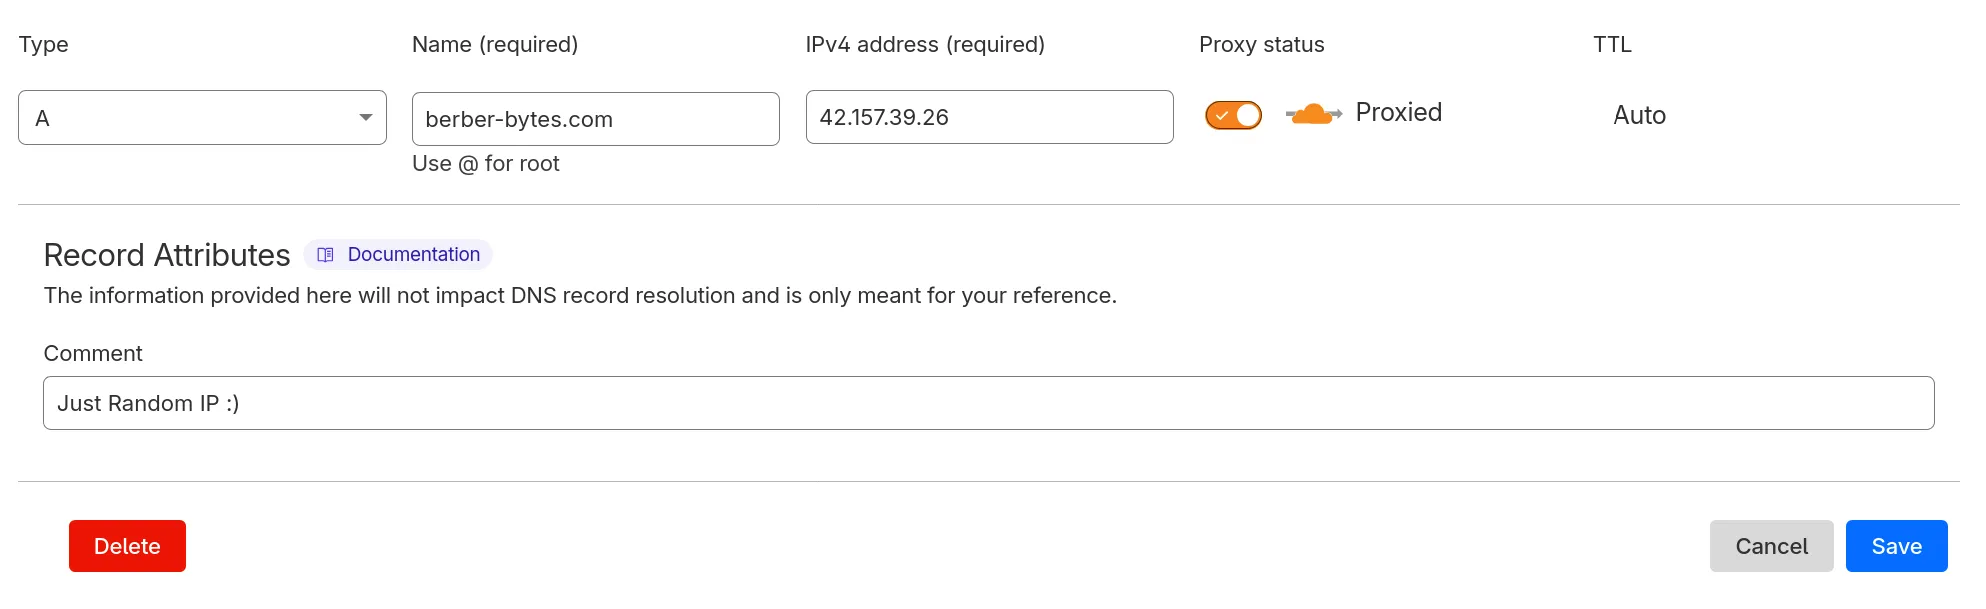
Section titled “Adding DNS records”Now point your domain to the server by creating A and/or AAAA (IPv4-6) records. Make sure the
Firewall Allowlisting
Section titled “Firewall Allowlisting”Here’s the thing, even with CDN proxying your traffic, your origin IP can still leak (through DNS history, email headers, or forgotten/unproxied subdomains). Once an attacker finds it, they bypass the CDN entirely and hit your server raw. Game over
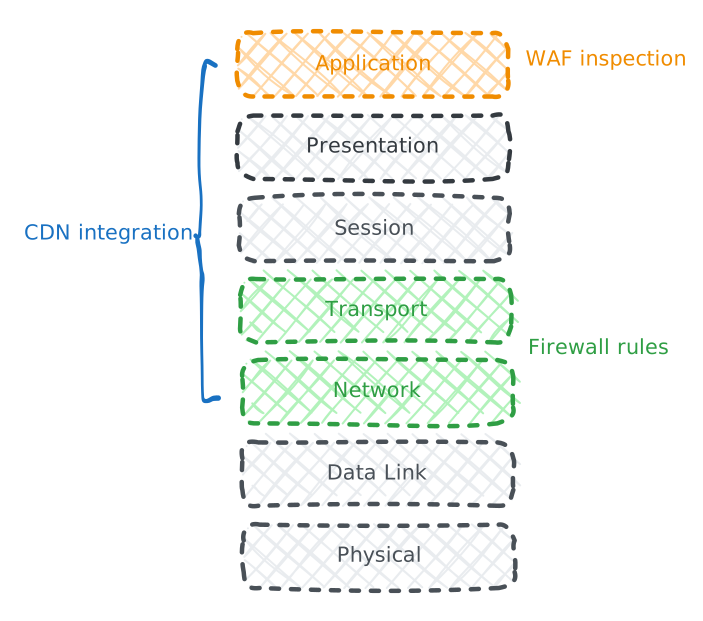
And to fix that, actually you only need to allow CDN’s IP ranges to reach your web ports. Everything else gets dropped at the firewall
For this, you want a dedicated firewall, not something baked into your application server. Such as Cisco ASA, FortiGate, or a software firewall like pfSense all work. We’ll use OPNsense in this walkthrough
Now the question is, which IPs do we allow? Actually most of major CDN publishes their IP ranges. They get updated from time to time, so you can fetch them dynamically (from their endpoints) rather than do it manually
Create an alias for CDN IPs
Section titled “Create an alias for CDN IPs”In your firewall, you need to create an URL table alias that automatically fetches cloudflare’s IP list at a regular interval (12h works fine to me)
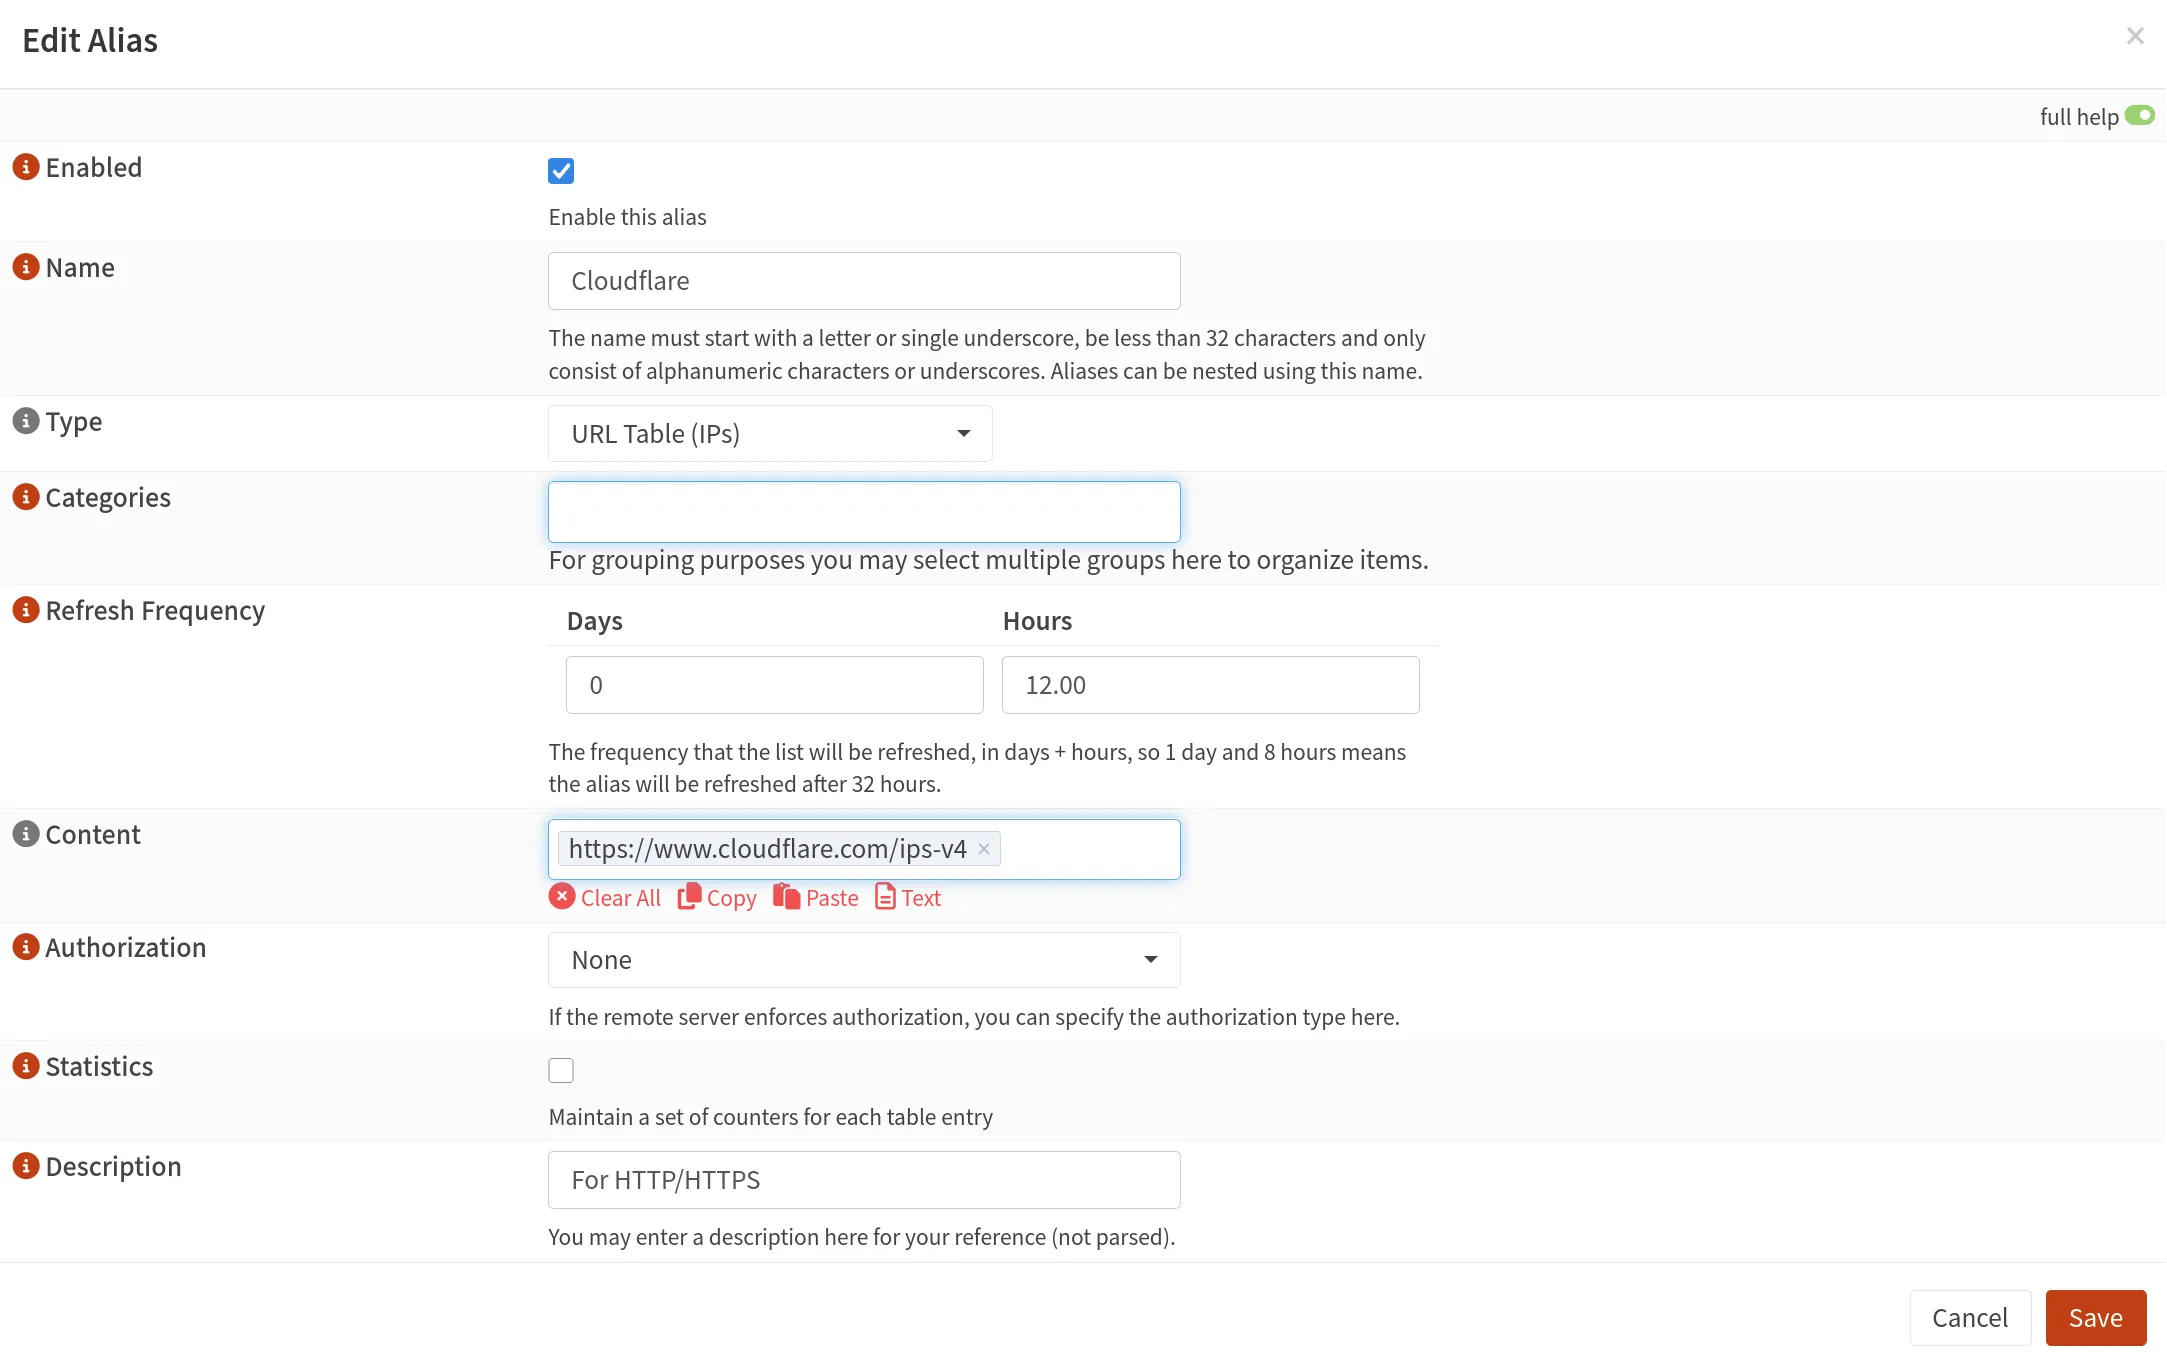
Network rules
Section titled “Network rules”An alias by itself does nothing, you need to attach it to a rule. There are two way to do that
80/443


Web Application Firewall
Section titled “Web Application Firewall”Actually, you could configure WAF rules directly from the CDN, that works. But if you’re already running a reverse proxy like traefik, you can go deeper by running your own WAF engine at the application layer using ModSecurity (apache/nginx) with CRS It inspects HTTP/HTTPs requests after they’ve passed through your CDN, and firewall, maybe IPS, right before they hit your app
How It Works with Traefik
Section titled “How It Works with Traefik”Traefik doesn’t really have a built-in WAF. Instead, you could uses a middleware plugin that forwards every request to a separate ModSecurity container for inspection. The flow looks like this
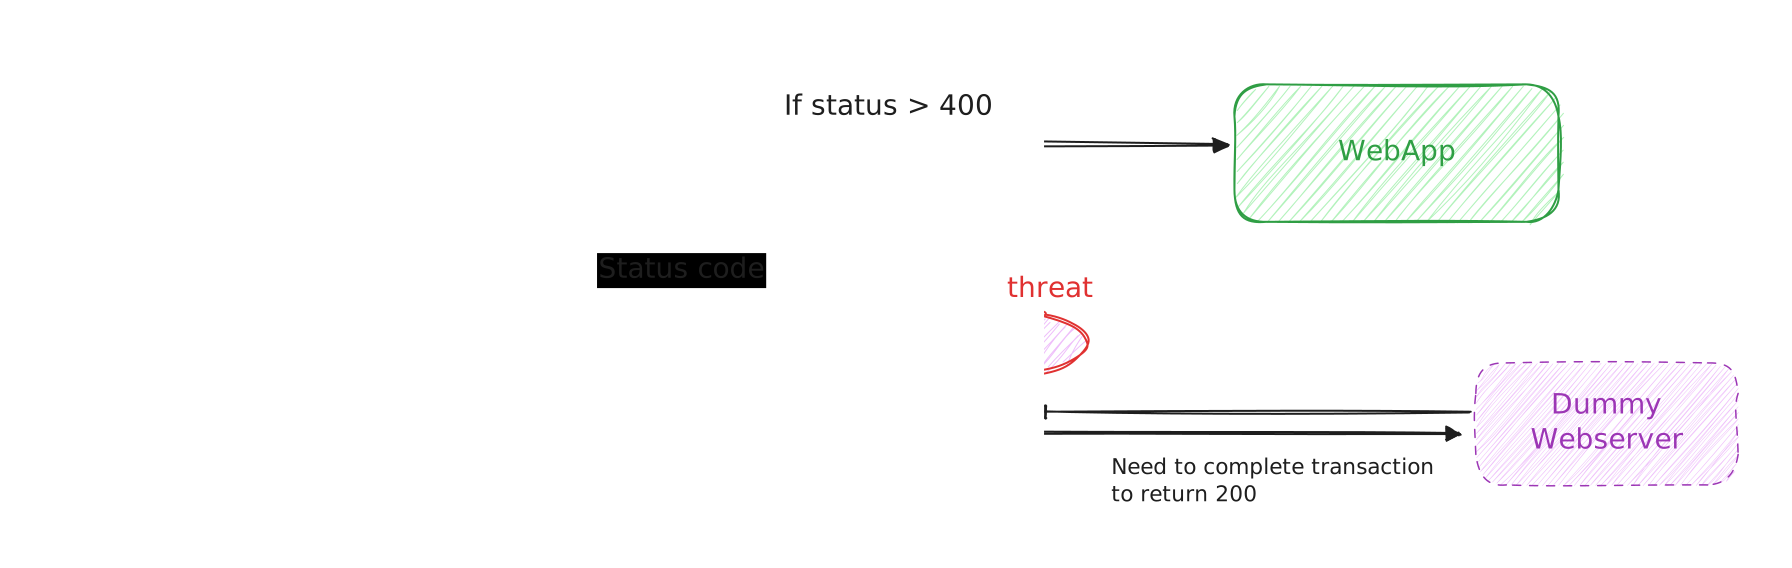
Setup Docker Compose
Section titled “Setup Docker Compose”The WAF container runs apache (traefik/whoami that always returns 200). The plugin checks the WAF’s response code, anything under 400 means the request is clean, but anything 400 or above means it gets blocked
services:  traefik:    image: traefik:v3.6    container_name: traefik    labels:      - traefik.enable=true      - traefik.http.services.traefik.loadbalancer.server.port=8080      # WAF middleware definition      - traefik.http.middlewares.waf.plugin.traefik-modsecurity-plugin.modSecurityUrl=http://waf:8080      - traefik.http.middlewares.waf.plugin.traefik-modsecurity-plugin.maxBodySize=10485760    depends_on:      - waf    networks:      - proxy    ports:      - "80:80"      - "443:443"    volumes:      - /etc/localtime:/etc/localtime:ro      - /var/run/docker.sock:/var/run/docker.sock      - $PWD/traefik.yml:/etc/traefik/traefik.yml      - $PWD/config:/etc/traefik/config:ro      - $PWD/acme.json:/acme.json      - $PWD/logs:/var/log/traefik    healthcheck:      test: ["CMD", "traefik", "healthcheck", "--ping"]      interval: 10s      timeout: 10s      retries: 3      start_period: 10s
  # OWASP ModSecurity  waf:    image: owasp/modsecurity-crs:apache-alpine    networks:      - proxy    environment:      - PARANOIA=1      - ANOMALY_INBOUND=10      - ANOMALY_OUTBOUND=5      - BACKEND=http://dummy    depends_on:      - dummy
  # Dummy backend required by ModSecurity  dummy:    image: traefik/whoami    networks:      - proxy
networks:  proxy:    external: true
So, three containers, one job which is inspect every HTTP request before it touches your application
And the Traefik static config traefik.yml, this is where the plugin gets loaded
experimental: plugins: traefik-modsecurity-plugin: moduleName: github.com/acouvreur/traefik-modsecurity-plugin version: v1.3.0Attaching the WAF to a Service
Section titled “Attaching the WAF to a Service”Last thing, attaching the middleware to your services. In your app’s dynamic config or Docker labels, reference the WAF middleware
http:  routers:    webapp:      rule: "Host(`berber-bytes.com`)"      entryPoints:        - WebSecure      service: webapp      tls: {}      middlewares:        - waf@docker
services: webapp: loadBalancer: servers: - url: "http://webapp:8443"#ORlabels: - traefik.enable=true - traefik.http.routers.webapp.rule=Host(`berber-bytes.com`) - traefik.http.routers.webapp.entrypoints=WebSecure - traefik.http.routers.webapp.middlewares=waf@docker - traefik.http.services.webapp.loadbalancer.server.port=8443Verifying middleware and waf status
Section titled “Verifying middleware and waf status”And of course, before you call it a day, make sure the WAF is actually doing its job
Check middleware attachment
Section titled “Check middleware attachment”Open the Traefik dashboard and navigate to your router. You should see something like waf@docker listed under the middlewares column
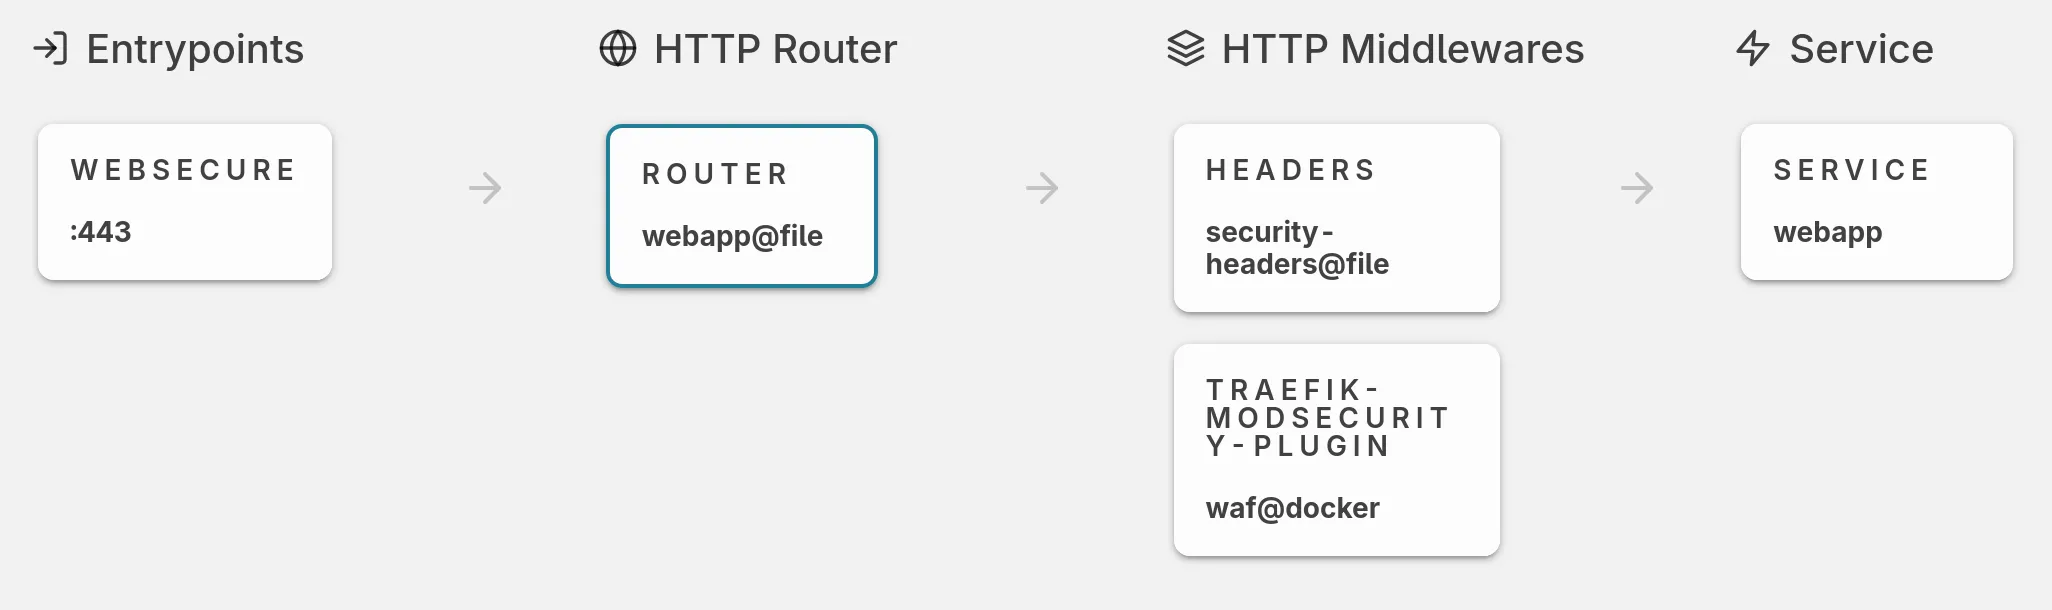
Test with a malicious payload
Section titled “Test with a malicious payload”Send a request that should trigger CRS rules. A classic RCE or maybe XSS in the query string works
curl -I "http://berber-bytes.com/?cmd=;cat%20/etc/shadow"curl -I "http://berber-bytes.com/?q=<script>alert(1)</script>"All of these should return Forbidden 403
Restoring the Real Client IP (Optional)
Section titled “Restoring the Real Client IP (Optional)”Behind CDN, your origin sees Cloudflare’s edge IPs, not the actual visitor’s. This means your logs, rate or bruteforce limiters, and WAF rules all operate on the wrong IP. To fix that, you can use a Traefik plugin like cloudflarewarp that reads the CF-Connecting-IP header and overwrites the request’s source IP
experimental: plugins: cloudflarewarp: moduleName: github.com/BetterCorp/cloudflarewarp version: v1.3.3...middlewares: cloudflare-ip: plugin: cloudflarewarp: disableDefault: falseNow! the front door is locked ✌︎㋡
